| examples | ||
| ESP32-HUB75-MatrixPanel-I2S-DMA.cpp | ||
| ESP32-HUB75-MatrixPanel-I2S-DMA.h | ||
| ESP32-RGB64x32MatrixPanel-I2S-DMA.h | ||
| ESP32-VirtualMatrixPanel-I2S-DMA.h | ||
| esp32_i2s_parallel_v2.c | ||
| esp32_i2s_parallel_v2.h | ||
| fillrate.md | ||
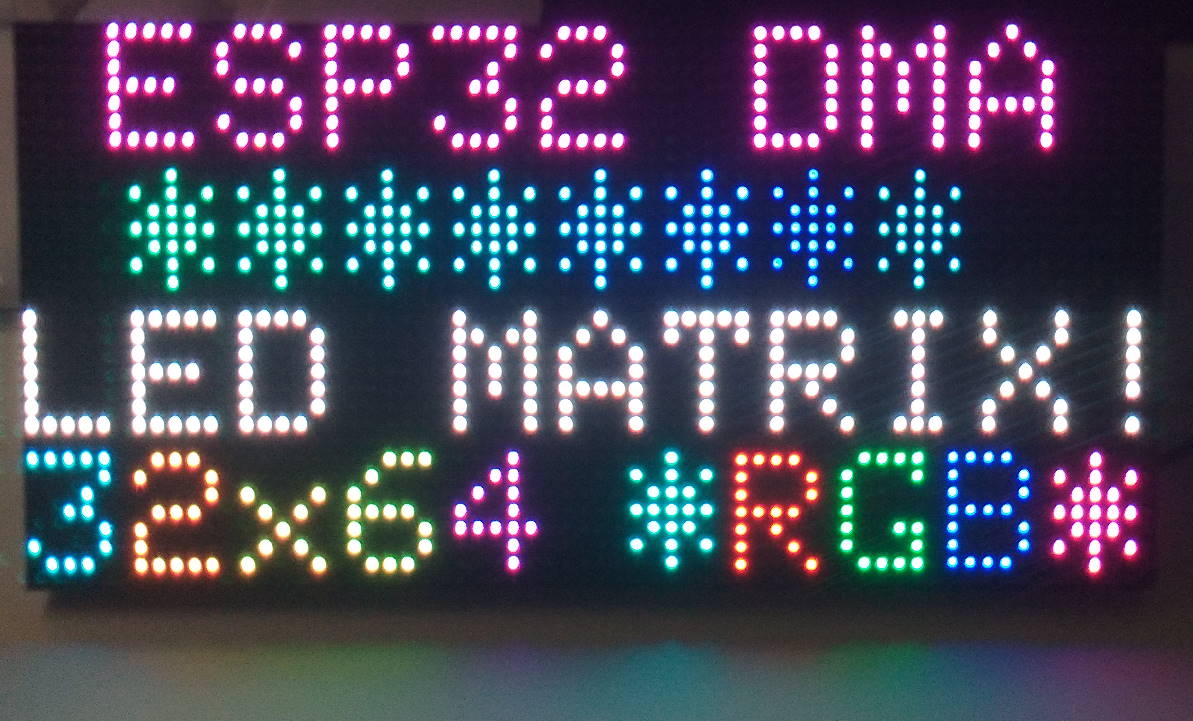
| image.jpg | ||
| keywords.txt | ||
| library.json | ||
| library.properties | ||
| LICENSE.txt | ||
| README.md | ||
| WiringExample.jpg | ||
HUB75 LED matrix library for the ESP32, utilising DMA
First time user? Please take the time to read the below
This ESP32 Arduino library for HUB75 / HUB75E connector type 64x32 RGB LED 1/16 Scan OR 64x64 RGB LED 1/32 Scan LED Matrix Panel, utilises the DMA functionality provided by the ESP32's I2S 'LCD Mode' which basically means that pixel data is sent straight from memory, via the DMA controller, to the relevant LED Matrix GPIO pins with little CPU overhead.
As a result, this library can theoretically provide ~16-24 bit colour, at various brightness levels without noticeable flicker.
Ones interested in internals of such matrixes could find this article useful.
Due to the high-speed optimised nature of this library, only specific panels are supported. Please do not raised issues with respect to panels not supported on the list below.
Panels Supported
- 64x32 (width x height) pixel 1/16 Scan LED Matrix 'Indoor' Panel, such as this typical RGB panel available for purchase.
- 64x64 pixel 1/32 Scan LED Matrix 'Indoor' Panel.
- 32x16 pixel 1/4 Scan LED Matrix 'Indoor' Panel using an ingenious workaround as demonstrated in the 32x16_1_4_ScanPanel example.
- Any of the above panel resolution / scan rates based on FM6126 / ICN2038S chips. Refer to PatternPlasma example on how to use.
Panel driver chips known to be working well
- ICND2012
- RUC7258
- FM6126A AKA ICN2038S, FM6124 (if specified properly)
Panels Not Supported
- 1/8 Scan LED Matrix Panels are not supported.
- RUL5358 / SHIFTREG_ABC_BIN_DE based panels are not supported.
- Any other panel not listed above.
Please use an alternative library if you bought one of these.
Update for 16x32 Panels
- There is a virtual panel class available to work with 16x32 panels (see: examples/16x32 Panel. This Panel includes drawing lines and rectanges, text and scrolling text
Getting Started
1. Library Installation
- Dependency: You will need to install Adafruit_GFX from the "Library > Manage Libraries" menu.
- Download and unzip this repository into your Arduino/libraries folder (or better still, use the Arduino 'add library from .zip' option.
- Library also tested to work fine with PlatformIO, install into your PlatformIO projects' lib/ folder as appropriate.
2. Wiring ESP32 with the LED Matrix Panel
By default the pin mapping is as follows (defaults defined in ESP32-HUB75-MatrixPanel-I2S-DMA.h).
 HUB 75 PANEL              ESP 32 PIN
+-----------+
|  R1   G1  |    R1  -> IO25      G1  -> IO26
|  B1   GND |    B1  -> IO27
|  R2   G2  |    R2  -> IO14      G2  -> IO12
|  B2   E   |    B2  -> IO13      E   -> N/A	(required for 1/32 scan panels, like 64x64. Any available pin would do, i.e. IO32 )
|   A   B   |    A   -> IO23      B   -> IO19
|   C   D   |    C   -> IO 5      D   -> IO17
| CLK   LAT |    CLK -> IO16      LAT -> IO 4
|  OE   GND |    OE  -> IO15      GND -> ESP32 GND
+-----------+
However, if you want to change this, simply provide the wanted pin mapping as part of the class initialization structure. For example, in your sketch have something like the following:
// Change these to whatever suits
#define R1_PIN  25
#define G1_PIN  26
#define B1_PIN  27
#define R2_PIN  14
#define G2_PIN  12
#define B2_PIN  13

#define A_PIN   23
#define B_PIN   22
#define C_PIN   5
#define D_PIN   17
#define E_PIN   -1	// required for 1/32 scan panels, like 64x64. Any available pin would do, i.e. IO32

#define LAT_PIN 4
#define OE_PIN  15

#define CLK_PIN 16

HUB75_I2S_CFG::i2s_pins _pins={R1_PIN, G1_PIN, B1_PIN, R2_PIN, G2_PIN, B2_PIN, A_PIN, B_PIN, C_PIN, D_PIN, E_PIN, LAT_PIN, OE_PIN, CLK_PIN};
HUB75_I2S_CFG mxconfig(
                        64,   // Module width
                        32,   // Module height
                         2,   // chain length
                      _pins,  // pin mapping
);
dma_display = new MatrixPanel_I2S_DMA(mxconfig);
The panel must be powered by 5V AC adapter with enough current capacity. (Current varies due to how many LED are turned on at the same time. To drive all the LEDs, you need 5V4A adapter.)
3. Run a Test Sketch
Below is a bare minimum sketch to draw a single white dot in the top left. You must call .begin() before you call ANY pixel-drawing (fonts, lines, colours etc.) function of the MatrixPanel_I2S_DMA class.
No .begin() before other functions = Crash
#include <ESP32-HUB75-MatrixPanel-I2S-DMA.h>
MatrixPanel_I2S_DMA matrix;

void setup()
{
  // MUST DO THIS FIRST!
  matrix.begin();  // Use default values for matrix dimentions and pins supplied within ESP32-HUB75-MatrixPanel-I2S-DMA.h

  // Draw a single white pixel
  matrix.drawPixel(0,0, matrix.color565(255,255,255)); // can do this after .begin() only

}

void loop()
{ }
Once this is working, refer to the PIO Test Patterns example. Note: Requires the use of PlatformIO, which you should probably use if you aren't already.
More Information
Build-time options
Although Arduino IDE does not seem to offer any way of specifying compile-time options for external libs there are other IDE's (like PlatformIO/Eclipse) that could use that. This lib supports the following compile-time defines
USE_GFX_ROOT - Use lightweight version of AdafuitGFX, without Adafruit BusIO extensions
NO_GFX - Build without AdafuitGFX, only native methods supported based on manipulating DMA buffer. I.e. no methods of drawing circles/shapes, typing text or using fonts!!! This might save some resources for applications using it's own internal graphics buffer or works solely with per-pixel manipulation. For example Aurora effects can work fine w/o AdafruitGFX.
NO_FAST_FUNCTIONS - do not build auxiliary speed-optimized functions. Those are used to speed-up operations like drawing straight lines or rectangles. Otherwise lines/shapes are drawn using drawPixel() method. The trade-off for speed is RAM/code-size, take it or leave it ;)
Can I use with a larger panel (i.e. 64x64px square panel)?
If you want to use with a 64x64 pixel panel (typically a HUB75E panel) you MUST configure a valid E_PIN to your ESP32 and connect it to the E pin of the HUB75 panel! Hence the 'E' in 'HUB75E'
Can I chain panels?
Yes.
For example: If you want to chain two of these horizontally to make a 128x32 panel you can do so by setting the MATRIX_WIDTH to '128' and connecting the panels in series using the HUB75 ribbon cable.
Similarly, if you wanted to chain 4 panels to make a 256x32 px horizontal panel, you can easily by setting the MATRIX_WIDTH to '256' and connecting the panels in series using the HUB75 ribbon cable.
You MUST either change the MATRIX_WIDTH or MATRIX_HEIGHT values within the 'ESP32-HUB75-MatrixPanel-I2S-DMA.h' file OR pass a compile time option if using PlatformIO for your development (you should use this).
Finally, if you wanted to chain 4 x (64x32px) panels to make 128x64px display (essentially a 2x2 grid of 64x32 LED Matrix modules), a little more magic will be required. Refer to the Chained Panels example.
Resolutions beyond 128x128 are likely to result in crashes due to memory constraints etc. You're on your own at this point.

Panel Brightness
By default you should not need to change / set the brightness setting as the default value (16) is sufficient for most purposes. Brightness can be changed by calling setPanelBrightness(int XX) or setBrightness8(uint8_t XX).
The value to pass 'setPanelBrightness' must be a value less than MATRIX_CHAIN_WIDTH in pixels. For example for a single 64x32 LED Matrix Module, a value must be less than 64. However, if you set the brightness too high, you may experience ghosting.
Also you may use method setPanelBrightness8(x), where x is a uint8_t value between 0-255. Library will recalculate required brightness level depending on matrix width (mostly useful with FastLED-based sketches).
Example:
void setup() {
    Serial.begin(115200);
    matrix.begin();  // setup the LED matrix
    matrix.setPanelBrightness(16); // Set the brightness. 32 or lower ideal for a single 64x32 LED Matrix Panel.

    // or another way
    matrix.setPanelBrightness8(192); // Set the brightness to about 3/4 or 75% (192/256) of maximum.
}
Summary: setPanelBrightness(xx) value can be any number from 0 (display off) to MATRIX_WIDTH-1. So if you are chaining multiple 64x32 panels, then this value may actually be > 64 (or you will have a dim display). Changing the brightness will have a huge impact on power usage.
Latch blanking
If you face issues with image ghosting when pixels has clones with horizontal offset, than you try to change Latch blanking value. Latch blanking controls
for how many clock pulses matrix output is disabled via EO signal before/after toggling LAT signal. It hides row bits transitioning and different panels may
require longer times for proper operation. Default value is 1 clock before/after LAT row transition. This could be controlled with MatrixPanel_I2S_DMA::setLatBlanking(uint8_t v). v could be between 1 to 4, default is 1, larger values won't give any benefit other than reducing brightness.
An example:
matrix.setLatBlanking(2);
Power, Power and Power!
Having a good power supply is CRITICAL, and it is highly recommended, for chains of LED Panels to have a 2000uf capacitor soldered to the back of each LED Panel across the GND and VCC pins, otherwise you WILL run into issues with 'flashy' graphics whereby a large amount of LEDs are turned on and off in succession (due to current/power draw peaks and troughs).
Refer to this guide written for the rpi-rgb-led-matrix library for an explanation.
- Refer to this example issue of what can go wrong with a poor powersupply.
- Refer to this comment in regards to certain panels not playing nice with voltages, and a 3.3volt signal that the ESP32 GPIO can only provide.
Inspiration
-
'SmartMatrix' project code: https://github.com/pixelmatix/SmartMatrix/tree/teensylc
-
Sprite_TM's demo implementation here: https://www.esp32.com/viewtopic.php?f=17&t=3188